 |
| The view from the kitchen window
In this picture there is grass. Finally, grass! Tomorrow is the first day of Spring and with it the promise of new growth. Platitudes aside we are very pleased to now have at least patches of our place that are dry enough to move the cows on to. I think Gen ate solidly for two hours - they've been eating hay and baleage but clearly there is nothing quite like grass. Six lambs and two kids so far with many more to come. The does each had a pedicure today - the constant mud does nothing for their hooves, imagine keeping your hand in the dishwashing liquid for several weeks and you get the picture. It (thus far) hasn't been a very cold winter and, while it has been wet, it has felt like Spring for a while. The hens are in full lay and the citrus trees in the Food Forest are covered in fruit. The rhubarb plants have leaves about two inches long and there are two marigolds out. Two almond trees are flowering and there are several plum trees about to burst into blossom. Even a crazy feijoa bush has a flower.
Our desserts are frequently based on lemons and eggs at this time of year. Lemon bars are sooo scrummy and (too) morish.
Lemon bars
3/4 cup white chocolate buttons or bits
1/2 cup butter (half fill a cup with cold water and use Archimede's principle to fill the cup with butter)
3/4 cup sugar
1/4 cup lemon juice
1 3/4 cup flour
Icing:
2 cups icing sugar
1/3 cup lemon juice, more-or-less
Grated lemon rind
Pre-heat oven to 175 deg C. Greae a 20cm by 20cm baking tray and line with baking paper.
Melt the chocolate and the butter in the microwave or in a pot over boiling water. White chocolate is very easy to burn so watch carefully.
Allow to cool slightly. Lightly beat the eggs and add them to the chocolate and butter mix. Add the suar and the juice and stir until well-mixed. Add the flour and stir until the ingredients are just combined.
Pour the batter into the baking pan, smooth and cook for between 25 and 30 minutes until a skewer comes out clean when inserted in the middle. Allow to cool.
To make the icing:
Whisk the icing sugar and the lemon juice until smooth, adding more juice if necessary.
Spread over the slice whilst still in the baking pan. Sprinkle grated lemon rind over the icing. Refrigerate for at least three hours - overnight is better. Cut into pieces and enjoy. This is a good recipe to freeze.
|

Sunday, 31 August 2014
Spring 1st
Tuesday, 26 August 2014
You have got to be kidding!
 |
| Emerald with her brand new kids |
Since I spent much time outside at dusk, sneaking cuddles and spraying navels (with iodine to keep out the nasties that hide in the mud) and generally praising Emmy, dinner was, of necessity going to have to be something quick. That was the plan anyway. We had left-over Bolognese sauce, some home-made feta cheese and had harvested the first mesclun salad from the greenhouse. I was also making tortillas. This was the slow bit and I should have made them much earlier. But, they were the best tortillas I have ever made! Some of them weren't pretty and their rollability was a little dodgy but yum yum yum. The ones that were a little holey were stacked - perfect solution.
Tortillas (makes 16, so freeze some)
6 cups flour
1t baking powder
1/2 t salt
1/2 a cup of butter, cut into small piece
2 1/2 cups of warm water
Place the flour, salt and baking powder in the bowl of a mixer. Unless you have a very large food processor, you will find it too small. Add the pieces of butter and run the mixer with a k-beater until the mix is like breadcrumbs. Slowly pour in the water with the motor running and leave it beating on slow for about a minute and a half. Remove all mixture from the bowl and place on a floured board. Very lightly knead the dough with a little extra flour if necessary so that it is no longer sticky. Cut the dough in half and leave in a warm place for about half an hour. Cut each half into eight and either roll into little balls or cubes. Rollout thinly until each piece is the size of a frying pan. Stack them, interleaved with greaseproof or baking paper and leave for another 15 minutes. (You can see now why it was a little slower than I had planned). Fry them one at a time in a frying pan - I used oil but butter would also do - for a few minutes on each side. They will loosen from the bottom and bubble when a side is cooked.
Depending on how well you have managed to get the tortillas into the frying pan roll them with a meat or chicken sauce filling, salad vegetables and crumbled feta (or some grated cheese) or stack them on a platter with the fillings between the layers.

Friday, 8 August 2014
Over the weather - or under the weather?
Black currants are so easy to grow and freeze (the picking not so much). We have recently moved many of our bushes to the Food Forest and sold the remainder to those willing to come and dig them out. The later diggers found it much more difficult than those who came earlier - the suction power of water has to be seen to be believed. No sooner were the bushes out of the ground than the holes filled up with water. Dragging the bushes out of the currant garden to the trailers and cars waiting was a mission through the bog that the area has become. When it dries out, the ex-currant garden will become another paddock for grazing in our quest to be totally self-sufficient and sustainable.
After a week of being in the company of coughing and spluttering students I thought I should try and boost my immune system with a little extra vitamin C. I say a little extra because heat destroys vitamin C pretty quickly so it's more of a comfort than anything else. Writing this in the middle of winter means that there are no fresh currants but the frozen are just as good. If we are going to use currants (red or black for juice or jellies) the fruit is just bagged, tagged and frozen. If we want to make jam then the process is a little more careful - de-strigging red currants is easier if the fruit is frozen first and sorting the black currants is best done with company!
Making cordial is a good thing. If you want less sugar, you can use less sugar. If you want more lemon juice, you can add more lemon juice. You can use red or black currants for this recipe or as I did in today's batch, use both. The recipe is easily halved or doubled.
Currant cordial (PdB)
 1 kg currants
500g sugar
500ml water
Juice and skin of 2 lemons
 Peel the lemons with a potato peeler and squeeze the juice into a large pot. Add the currants, fresh or frozen, the sugar and the water. Bring to the boil and simmer for about 5 minutes. Add the peeled skin and the lemon halves themsleves. Bring back to the boil and simmer for another 5 minutes. Depending on how much time you have, you can let the mix cool, then run the juice through a jelly bag. If you are in a hurry, you can carefully strain the fruit through a sieve. If you are not too pushy, the reserved fruit can be saved to serve with yoghurt or added to apple for a pie or a crumble.

If you are pushy and push the fruit through the sieve until you can get no more juice, the resulting cordial will be thick enough to serve over ice cream etc.
However you strain it, use a funnel to fill sterilised bottles and seal. You will need to keep the bottles in the fridge.
After a week of being in the company of coughing and spluttering students I thought I should try and boost my immune system with a little extra vitamin C. I say a little extra because heat destroys vitamin C pretty quickly so it's more of a comfort than anything else. Writing this in the middle of winter means that there are no fresh currants but the frozen are just as good. If we are going to use currants (red or black for juice or jellies) the fruit is just bagged, tagged and frozen. If we want to make jam then the process is a little more careful - de-strigging red currants is easier if the fruit is frozen first and sorting the black currants is best done with company!
Making cordial is a good thing. If you want less sugar, you can use less sugar. If you want more lemon juice, you can add more lemon juice. You can use red or black currants for this recipe or as I did in today's batch, use both. The recipe is easily halved or doubled.
Currant cordial (PdB)
500g sugar
500ml water
Juice and skin of 2 lemons
If you are pushy and push the fruit through the sieve until you can get no more juice, the resulting cordial will be thick enough to serve over ice cream etc.
However you strain it, use a funnel to fill sterilised bottles and seal. You will need to keep the bottles in the fridge.
Pumpkin Pie - no, make mine a gnocchi
On the garden front the seedlings are popping up. The small greenhouse we purchased is keeping all our babies snug - kale, broccoli, cabbages and two types of lettuces are up are all doing well, The cabbages are now about 1cm tall and growing! This is the first year that we have had a plan, a written down plan of what we need to plant and when. I worked backwards from Labour Weekend (traditionally THE gardening weekend in NZ) and worked out germination times, so I knew when to plant the seeds in relation to when I could plant seedlings out in the garden. The pumpkins and squash will not be planted for some weeks but we still have stored pumpkins. We have only recently been able to harvest carrots, and with the corn long finished had been relying on the pumkins for our yellow/orange vegetable in our "eat a rainbow a day" regime. After a while it becomes difficult to think of how to serve them that is a little different. We also still have a good crop of sgae growing in the garden. Pumpkin Gnocchi will convince non-pumpkin eaters to enjoy them.
Pumpkin Gnocchi (KB)
These quantities will serve 4 but are easily extendable.
1kg pumpkin, peeled and cut into 3cm cubes
Olive oil or cooking spray
salt and white pepper to taste
1 - 1.5 cups of plain flour
1/4 cup pecorino (or parmesan), finely grated
125g butter
1/2 cup sage leaves
Extra pecorino to serve
Preheat the oven to 200 deg C. Line a baking tray with baking paper. Place the pumpkin on the prepared tray and spray with oil or cooking spray. Season with salkt and pepper. Roast pumpkin for 30 - 35 minutes or until soft. Transfer to a large bow and mash the pumpkin until smooth.
Stir the flour into the pumpkin. Add the first measure of peccorino. Stir until well combined and a soft dough forms (the dough should not be sticky). Turn dough onto a lightly floured surface and lightly knead. Roll the dough into 4 30cm-long rolls and cut each roll into 5cm pieces.
Bring a saucepan of salted water to the boil over high heat. Add a quarter of the gnocchi and cook for two minutes until they float to the top. Cook for a further 2 minutes. Remove them with a slotted spoon and transfer to a large bowl. Cover to keep warm. Cook the remaining batches of gnocchi.
Meanwhile, to make sage butter, heat the butter in a saucepan over medium heat until sizzling. Add the sage leaves and cook for 2 minutes until the butter turns golden. Put the gnocchi in serving bowls. Spoon over the sage butter and season with salt and pepper. Sprinkle with the second measure of peccorino and serve.
Eggsactly! When is an egg not an egg?
More to the point, when is a free range egg not a free range egg? I understand that the "definition" of a free range egg is that it is laid by a hen that is free to range outside as opposed to being in a cage or a barn. In reality this means that there is a door (about the size of a cat-flap) that the hens can go out through if they choose. To my way of thinking by the time the several thousand queue up to get out it will be time to queue up again to come back inside. The American term pastured hens in some ways sounds more healthy but then some people think it means that the hens must only be fed grass.
For us free range means that the hens are free to be hens. We describe our hens as happy hens and they are free to range over about an acre. They still are contained because we value our vegetable gardens too but an acre is a large space for the 28 hens that we have (and the ducks and the geese mind). There are large plantings of flax for them to hide under when a hawk lies overhead, tall trees for shade and lots of grass and dirt and stuff. We shut them up at night in houses - to keep them safe and warm and so that we can easily collect the eggs.
Take a look at this raw egg. See how the white has stayed together rather than spread over the plate. This is the mark of an egg that has been out eating the right amount of grass. Chefs prefer eggs like this as they are much easier to poach. Chlorophyll, the green in grass is a very good detoxifier and this is one of the reasons that small operation truly free range hens lay eggs that keep much longer than the other sort.
 One can artificially cause the yolks to go orange but ours are just as they come. Again, allowing the hens to eat grass and weeds and vegetables such as silver beet guarantees yolks so orange that they are off the scale of yolk colours!!!! This is not to say that we only feed our hens grass. We feed them laying pellets as well and they reward us by being friendly and healthy and providing many eggs every day. We sell as many as we can produce and have a waiting list - testimony to our happy girls.
For us free range means that the hens are free to be hens. We describe our hens as happy hens and they are free to range over about an acre. They still are contained because we value our vegetable gardens too but an acre is a large space for the 28 hens that we have (and the ducks and the geese mind). There are large plantings of flax for them to hide under when a hawk lies overhead, tall trees for shade and lots of grass and dirt and stuff. We shut them up at night in houses - to keep them safe and warm and so that we can easily collect the eggs.
Take a look at this raw egg. See how the white has stayed together rather than spread over the plate. This is the mark of an egg that has been out eating the right amount of grass. Chefs prefer eggs like this as they are much easier to poach. Chlorophyll, the green in grass is a very good detoxifier and this is one of the reasons that small operation truly free range hens lay eggs that keep much longer than the other sort.
Thursday, 7 August 2014


In a pickle!
Everybody is in a pickle. Even Jamie Oliver is in a pickle. It has become very fashionable to seve pickles with all sorts of meals. Some restaurants even have a pickle section in their menu. Jamie Oliver suggests it as a way of preserving those lone carrots and bits of onion that are left in the fridge at the end of the week. Bread and Butter Pickles are very pretty either in the jar or on the plate. A deliberately made pickle is even better.
After six years our citrus orchard is doing its thing and we have limes. Admittedly (because we only have 3 bushes) the limes are more special than the other fruit which we can pick by the crateful and not notice where we've been. Though Bill suggested that he would like them all for putting in a gin and tonic I froze them for use later. They freeze so easily - I pop them into a plastic bag, suck out the air and they're done. I make Lime Marmalade with limes directly from the freezer. For Kent's Lime pickle I thaw them sufficiently to be able to cut them and remove pips. Ours don't have many so it is not too difficult. This is a good recipe for the home grower as it only takes a small quantity of limes.
Lime pickle (KB)
7 limes
1T salt
375g raisins
1t chilli powder
4 cloves of garlic, crushe
1 1/2 T fresh ginger, crushed
500ml cider vinegar
500g browm sugar
1T of fresh horseradish (or 4t preserved horseradish)
Segment the limes (as best you can if they are frozen) and remove the pips. Sprinkle with salt and leave(covered) for 48 hours, stirring occasionally. Add the limes and all the remaining ingredients to a pot (including all the juice that has formed) and cook on a rolling boil until thick.

Put into hot sterilised jars, removing any air bubbles with a knife. Seal with sterilised lids. LABEL!
Sunday, 3 August 2014
Truly enough rain!
Spring is on the way though we'd really rather it wasn't. So many things are thinking that winter is over that if we get a frost there is going to be some serious damage done to trees and plants and animals.
Still, planting for the next season has begun in earnest. I've planted hundreds of seeds each in little pots in our new greenhouse. Our place is subjected to horrendous winds at times so the only place that we can have the greenhouse is on the front verandah - not so smart looking but it is sheltered. Yesterday we had such fierce winds that some of our 10 metre high firewood trees were snapping off like matchwood. We were taking a family on a tour of the farm and were just going through the gate into the orchard when I heard a terrible cracking noise. The biggest tree that came down snapped off about 4 m above the ground just inside the gate. The goats were briefly happy. We lobbed the trunks over the fence into their paddock - they had a good chomp but then they disappeared back into their respective houses. Poor things - they must think they are made of spun sugar!
Last year we started saving seeds in earnest. This is a good idea for many reasons. The seeds will be from plants that have grown in our area and so will be ok with our conditions. It is much cheaper to plant seeds and if we don't have to buy them then it is cheaper still. Planting our own seed means that we know it hasn't been modified in any way other than natural mutation. This year we have swapped some seeds with a friend and will do more of this as the season unfolds.
The water is everywhere and then some! Today Martinborough has been almost closed to the outside world by flooding. Our stupid sheep have decided that it is time to start lambing. Lillispot lost twins but Zelda gave birth to a beautiful black Arapawa cross (with a white tail) last Sunday. We have named her Zoe. We will keep her as her wool looks as if it will be worth spinnng. She is very large and very lively but poor thing - there is so much water in every paddock that it can't be pleasant for them.
Our front lawn is now a small lake, with an outlet river that runs across the paddocks where the sheep are.
Despite the weather it is still gratifying and satisfying to be able to slosh out to the garden and harvest vegetables for dinner - swedes, carrots, fresh herbs, potatoes, caulifower, beans from the freezer and schnitzel from the farm. To most people swedes are vegetables to be avoided but mashed with lots of butter and freshly picked chopped parsley are delicious.
Still, planting for the next season has begun in earnest. I've planted hundreds of seeds each in little pots in our new greenhouse. Our place is subjected to horrendous winds at times so the only place that we can have the greenhouse is on the front verandah - not so smart looking but it is sheltered. Yesterday we had such fierce winds that some of our 10 metre high firewood trees were snapping off like matchwood. We were taking a family on a tour of the farm and were just going through the gate into the orchard when I heard a terrible cracking noise. The biggest tree that came down snapped off about 4 m above the ground just inside the gate. The goats were briefly happy. We lobbed the trunks over the fence into their paddock - they had a good chomp but then they disappeared back into their respective houses. Poor things - they must think they are made of spun sugar!
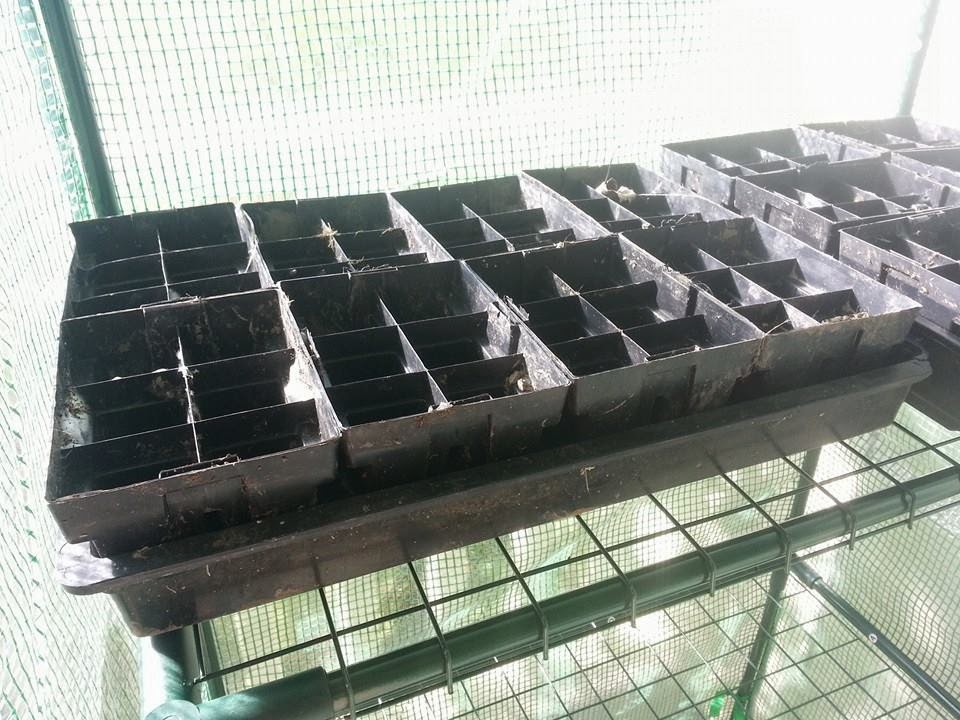 |
| Ready to go in the greenhouse |
 |
| A cabbage seedling after 1 week |
Tonight we planted several more types of chillis (our own seed) and some Brandywine Cherry tomato seeds, as well as several punnets of cauliflower.
The water is everywhere and then some! Today Martinborough has been almost closed to the outside world by flooding. Our stupid sheep have decided that it is time to start lambing. Lillispot lost twins but Zelda gave birth to a beautiful black Arapawa cross (with a white tail) last Sunday. We have named her Zoe. We will keep her as her wool looks as if it will be worth spinnng. She is very large and very lively but poor thing - there is so much water in every paddock that it can't be pleasant for them.
 |
| Zoe at three hours old |
 |
| Lake Front Lawn |
Saturday, 26 July 2014
Apples and bubbles
 |
| Sparkling Apple Wine |
Apple Wine PdB
Enough good apple bits to fill a 20 L bucket or barrel
1 sachet wine yeast
8kg sugar (white or brown)
1 kg raisins
Juice of 9 lemons
A small cup of tea
Chop up the apples and put them in the bucket. Fill the bucket with boiling water. Put the lid on and leave for a few days. Stir twice a day.
Strain out the fruit (feed it to the pigs) and add the sugar, the raisins, the lemon juice and the tea. Fill the bucket again to 20 L and stir until the sugar dissolves. Add the wine yeast, stir, cover with the lid and leave in a warm place. We left ours on the kitchen bench wrapped in towels. Leave for two weeks or so and then transfer to a demijohn. Try to do this without transferring any sediment, by syphoning it into the demijohn. Make the quantity up to 20 L again by adding water.
Leave in the demijohn in a cool place for several months. Once the liquid is clear syphon the wine into sterilised bottles and lid. The wine is drinkable at this stage but will most certainly improve with age.
In the summer I don't really like to drink beer but I do like a glass of cold cider occasionally. Clearly it is not summer now so after a hard day's work a mug (my very large special pottery mug) of mulled cider is a great warming treat. First make the cider though.
Apple cider
To be perfectly correct one makes cider by crushing the fruit but most of us don't have the equipment.
Any type of apples are fine for cider though a mix of sweet and bitter is best.
Chop whatever quantity of apples you have, cores and all into large chunks. Place the pieces in a large plastic or crockery container, though don't fill it too full or it will overflow when fermenting. Cover with boiling water and then put a cloth over the top. Leave for 10 days stirring daily.
Crush the apples with a potato masher and strain the liquid through a jelly bag or muslin. Feed the pulp to your pigs! Add 1 cup of sugar to every 4 L of liquid. Stir to dissolve the sugar. Strain again into 2 L plastic bottles and screw on the tops lightly. Leave until the fermentation has stopped and then syphon into clean plastic bottles and screw on the caps tightly this time. You can drink the cider in two weeks but it does improve a bit with age. Your cider may well be very fizzy so chill well before opening.
On a cold night after a good day's work when the fire is going and all is well with the world mull some cider on the woodburner.
In a pot that can go on the top of the woodburner make a sugar syrup with 1 - 2 T of sugar to each cup of water. On the stove bring the water to the boil and add 2 or 3 cloves a cinnamon stick and half a sliced lemon or orange. Simmer for 5 minutes, add 1 - 2 cups of cider and then reheat on the top of the woodburner.
Thursday, 24 July 2014
Vitamin C is good for you.
Mother Nature must have known what she was about. At the time of the year when we can all use extra vitamin C the citrus fruits kick into gear and produce large quantities of fruit. The citrus back-bone of our food forest is hugely productive. Last weekend we picked about 30kg of grapefruit and lemons and you can't see where we touched the bushes. We will have hundreds of kilos this year though not too many limes. We even have edible oranges.
Today was crutching day. For the non-farmers amongst you this is when the ewes get a trim - bum and tum - so that when the lambs are born they can find the clean udder easily. We have been putting it off because you can't shear sheep when the wool is wet. With a break in the weather the shearer was round to "do" our nine ewes this morning. Sadly we had miscalculated our dates and one of the ewes, my favourite, Lilispot had lambed in the early hours of the morning and the little black female lamb had died. On a small property it is difficult to run the ram in a separate paddock so he and his girls run together all year. This does make any serious predictions a little tricky.
As we have lemons and eggs our guests this weekend will be treated to an old-fashioned favourite, Lemon Meringue pie.
Lemon meringue pie (PdB) - serves 6 - 8
Pastry
You can use bought ready rolled sweet pastry (about 1 and a half sheets) or you can make your own.
To make your own
250g flour
1/2 t salt
175g butter
grated rind of one lemon
2 T sugar
3T water
3T lemon juice
melted butter
Rub the butter into the flour, salt and lemon rind, make a well in the centre and add the liquids. Gently bring all together into a sold ball. Chill for 30 minutes then roll out.
For either sort of pastry cut to fit a 25cm round or 34cm by 12cm paper lined tart tin. Chill for another five minutes then line with baking paper and weights or rice. Bake 12 - 15 minutes at 180 deg C, then remove the weights and bake until golden (about 5 minutes). Brush the hot pastry with a beaten egg.
Lower the temperature to 160 deg C
The filling
200ml water
100g caster sugar
2T cornflour mixed into 3 T water
20g butter
2 - 3 egg yolks depending on size (some of our eggs are enormous)
1/2 t lemon rind, grated
1/2 t orange rind, grated
50 ml juice from the lemon and the orange
Heat the water with the sugar in a pot until the sugar is dissolved, then bring to simmering temperature. Add the cornflour paste while whisking and then simmer until thickened. Add the butter and stir until it is melted. Mix the egg yolks a little and stir into the thickened mix with the rinds and the juices. Remove from the heat.
The meringue
2 - 3 egg whites
120 g caster sugar
Beat the egg whites, (until they are foamy) add the sugar gradually while beating. Beat until the mix is very thick and glossy.
Assembly
Pour the lemon mixture into the pastry case and top with meringue. Smooth and then create some whirls if you like. Make sure that the edges are sealed.
Sprinkle the top with a little extra sugar.
Bake for about 25 minutes until the meringue is golden.
Cool completely before serving so that you can cut neat pieces.
The Great Flood
In the winter, our place is wet. It is not just normal wet, rather super wet - up to pigs' ankles wet! This makes farming and gardening somewhat unpleasant at this time of the year.
Our philosophy has now completely changed with regard to how we grow things. We had been leasing another 10 acres across the road but the owner put it on the market so we had to bring the cows home. This meant a rethink of a) what we were doing and b) how we were to do it. On our own 6 acres we were suddenly over-stocked. The largest of the cows had to go, as did several sheep and a few goats. Another cow has gone to live with pig-raising friends - this is an ideal relationship - they have a bull so Devonshire will get in calf, we get the calf to hand rear and they get the milk for their happy pigs. But, we still had to think our way through where and how everything was going to work. We currently have two donkeys, one cow (Little Miss Gentle) and a couple of calves from January, ten sheep, ten goats, three rabbits, about thirty hens, thirty ducks, two sows, a boar and two piglets, five dogs and five cats. This is a large number of animals on a relatively small piece of land. In order for this to be close to sustainable we have to be able to feed the animals as well as ourselves. Every bit of the land now has to be doing something, either growing food for ourselves or for the animals.
Our citrus grove had started to produce significant quantities of fruit in 2013, and in the winter of 2013 we started planting new fruit trees there, to replace those that have drowned in our main orchard. It was still planted in a traditional way, trees at 5m centres. Then a friend started talking about Food Forests. Suddenly, we started to question our planting ideas. Why do we have such wide avenues between the rows of trees? Why do we have lawn that we still have to mow? Why have we got a huge orchard, a citrus grove, a strawberry garden, a currant garden (45 currant bushes) and a very large vegetable garden, all in separate places and all requiring watering, weeding and generally looking after? So we made a plan. In the words of a long-gone hair shampoo advertisement, it won't happen overnight, but it will happen. Already we have replanted two strawberry beds, moved several red and black currant bushes (and taken cuttings for many more), moved ten rhubarbs, eight gooseberries, the hazelnuts, some cape gooseberries (that will now seed forever), planted a thyme bed, a coriander bed, six blueberries and continued to plant fruit trees. Some of the citrus trees have been under-planted with shallow growing vegetables and the con-centric rows of citrus trees (three circles at 5m, 10m and 15m centres and 36 bushes in total) are now being joined up with lower growing plants, straw and lots and lots of well-rotted manure (our animals are very good at providing us with this.)
We still have to contend with constant flooding. We have planted many many flax bushes and gum trees to suck up the water in the winter, but no sooner do we get one area less wet, than the water seems to pop up somewhere else. Today we planted another thirty poplar trees, partly for stock food and partly as water suckers. In the summer, many parts of the farm benefit from this deep watering but right now it's awful. Truly awful. The pigs are in mud all day unless they go into their houses, and we are desperately racing against time to build a barn for them to get them out the mud. The barn itself is built, but the concrete floor needs to go down and the fences finished and we can't do this until it stops raining. We plan to build another one for the cows, and keep them out of the worst of the mud too. We will follow Joel Saletin's ideas on this - lay straw, put the cows in, feed them, then as they create manure, lay more straw, feed them, lay straw and so on. But, at the same time we have gardening to do and animals to tend to and it continues to rain.
The only farm dwellers that really like the rain are the ducks, of which there are far too many. We don't seem to be able to breed up hens or geese, but we can sure breed ducks. Before this season's ducklings arrive we have to cull a few out. They eat a huge amount of grass and make rather a mess. Because they free range in the orchard the ducks are living the good life but it does mean that they tend to be not particularly fat (as in chubby) and quite like wild duck to taste. Kent's recipe for duck soup will make any scrawny duck superb.
Duck soup with duck legs KB
Two ducks, plucked and dressed. Remove the legs (keep them though) and save the kidneys, the hearts and the liver.
The soup:
Add the carcase and the breast meat to a 10 L stock pot and saute in a small quantity of extra virgin olive oil. When the carcase has browned a little, add
1 cup celery root
1 cup chopped leek (white part)
1 cup carrots, chopped in largish dice
2 onions, chopped in half
4 bay leaves (I use fresh and crush them before adding)
1 cup parsley stalks
10 black peppercorns
1 allspice
20 coriander seeds
10 cumin seeds
Keep the heat up and stir with a wooden spoon.
After a few minutes, add 50g flour, whilst still stirring.
When the flour has cooked a little, add
200mls sherry
100mls dry vermouth
1L red wine
Turn the heat down and simmer for two hours.
Strain the soup, retaining the vegetables and the meat and chill the stock.
To cook the duck legs
Heat the oven to 160 deg C and melt a small quantity of butter in a cast iron pan. Dust the legs with flour and saute the legs until they are golden and sealed. Remove from the pan and deglaze it with 50 ml of gin and quickly add some of the saved stock. Replace the legs and add sufficient stock to cover them. Add some fresh rosemary, some sliced garlic, freshly ground black pepper and 10 juniper berries. Place in the oven and cook for 3 hours, making sure that the legs stay covered in stock.
Remove the legs from the stock and shred the flesh off the bones coarsely. Mould the leg meat back around the bones into their original shape. Wrap in pig's caul (our local butcher in Greytown sells this if you ask him) and set aside. If you absolutely can't get this, then skip this step and leave the legs as they were.
Form the cast iron pan, remove al the meat juices and any remaining stock, add the remainder of the chilled stock and boil until the volume is reduced by half. Season with salt and pepper to taste.
Place the legs on a baking tray and bake at 260 deg C for 4 minutes.
Apple wontons to serve
Core one apple and place it in a small pan with 1 teaspoon of apple tea (or water), a shot of brandy and a little salt and pepper. Squeeze a lemon over the apple and add 20g of butter. Simmer for 10 minutes with a pinch of chilli until the apple breaks down into a rough paste. Take a wonton sheet and brush the edges with beaten egg. Add a tablespoon of the apple mix and shape the wonton to your favourite shape. Fry all the wontons in a small pan with a little grapeseed oil. While you are doing this, place the duck legs back in the oven for about five minutes to reheat (no more than 5 minutes).
Reheat the soup slowly.
Now, place a leg into each bowl, gently pour over the soup and garnish with an apple wonton.
Enjoy!
Wednesday, 23 July 2014
So it snowed!
It didn't snow here at home but it did snow on the road between us and Wellington (work). Along with several hundred extra commuters we (just) caught the train. We had to stand but at least it was nice and warm. Not so for our poor animals. The pervasive wetness must depress them as much as it depresses us. Fortunately (of course by good planning ;-) ) we are not lambing or kidding yet. We have very little grass left and so are feeding baleage (pickled grass) each morning and night to the cow and the goats and yummy molasses coated grains as an extra treat for the goats. We need to buy more hay as the donkeys and the rabbits eat quite a bit of it. Before you ask, these are rabbits that we want to be feeding hay to, rather than the other sort. When it is so cold and miserable my thoughts turn to puddings. Whilst steamed puddings are traditionally winter puddings I prefer fruit based puddings.
We are just using the last of the carefully stored pears - not so good for eating fresh any more but still good for cooking. As we are on the lengthening daylight hours side of the winter soltice we have an abundant egg supply.
Pear brulee wtih raspberries KB
The dessert has poached pears in a tartlet of creme brulee and raspberries served with English cream.
To make the tartlet case(s)
500g flour
250g soft butter
125g sugar
2 and a half eggs.
Mix all ingredients in a cake mixer then roll out and line a large tart dish or several small ones.
To make the English cream
8 egg yolks
125g sugar
1 vanilla pod
1 L milk
Bring the milk to the boil with the vanilla pod.
Cream the butter and sugar together well.
Pour the milk onto the eggs. Strain this back into the pot and heat, stirring for two minutes. Strain again and reserve.
To make the Brulee cream
1 L cream
8 egg yolks
125g sugar
1 punnet fresh raspberries
While bringing the cream to the boil, whisking briskly, add the eggs and the sugar.
Quickly pour the cream over the egg mixture, add half the raspberries and pour into a baking dish. Place in a preheated oven at 250 deg C for 5 minutes. Chill for an hour.
Poaching the pears in wine stock
Note: this stock can be used over several days and for poaching any fruits. The wine can be of your choice or excluded and replaced with water if you prefer.
1L water
500ml Late Harvest Chardonnay
50ml Poire William (pear brandy)
125g sugar
1 lime
Bring to the boil for 2 minutes and then reduce the heat down to a constant simmer. Add cored and peeled pears for 10 minutes until they are soft enough to be eaten with a spoon.
Assembly
Stuff the central holes in the pears with a little of the brulee.
Place some raspberries into the tartlet case(s) and then add the remaining brulee. Sprinkle some castor sugar liberally over the top. Either place the brulee under the grill for a few moments or scorch the top with a blow torch.
Place the stuffed pear on top, swirl some English cream on the plate and enjoy!
All year round food supply
If one is serious about providing one's own food, then one really has to work at it. There is no point in growing a surplus of food in the easy times, during the summer, and then having to resort to the supermarket because the garden is finished for the season once the days get shorter. Food production must be planned so that there is something growing all year round. Even though it is mid-winter now, we have still many vegetables ready to eat from the garden. In the last two days we have harvested swede, beetroot, carrots, cauliflower, spinach and leeks. We still have pumpkins left on the verandah and a large quantity of frozen vegetables. If we ventured into the wettest part of our farm we would also be able to dig potatoes and Jerusalem artichokes. Our onions were a flop last season so we are buying them but we intend to do better in the next season. The garlic we planted on the shortest day 2013 was magnificent. The elephant garlic (not really a garlic but related to the leek family) was as large as a man's fist. We have planted our 2014 crop and still have plenty left. We also have a (very) large quantity of frozen zucchini. It is supposed to snow tonight so I have made soup this evening to take to work tomorrow for our lunches.
Zucchini and garlic soup (PdB)
1 T oil
1 chopped onion
4 - 10 cloves of garlic
1 kg of zucchini (or about 4 large ones)
a quarter of a cup of fresh herbs
1/2 t dried oregano
1 L stock (vegetable stock if you want to make a vegetarian version)
Depending on what else I am doing at the same time, I either gently sweat the onions and the garlic in the oil on the stove top, add the roughly chopped zucchini, the stock, most of the fresh herbs and the oregano and simmer for 45 minutes. If I am busy I heat the oven to 180 deg C and mix the oil into the vegetables in a roasting dish and cook for 20 - 25 minutes until the zucchini is soft. I then add the herbs (reserve a few) and the vegetables to the hot stock and simmer for a few minutes.
In either case, then blend with a hand blender or transfer to a blender and whiz.
Serve with croutons and a pinch of finely chopped fresh herbs or a few shreds of lemon rind.
Subscribe to:
Posts (Atom)